


Stop the Fake Virus Pop-Ups Fast
- 1 day ago
- 7 min read
If you recently clicked a link, or went to a website you visit "all the time", but maybe typed a little too fast and did not check the spelling, you may have landed on a fake lookalike site.
For example, someone meaning to visit:
But instead might accidentally type something like:
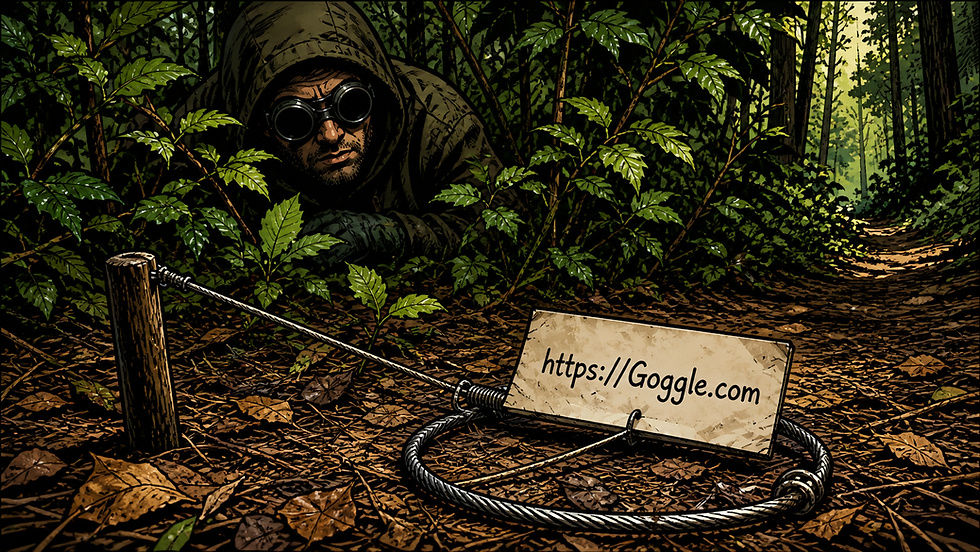
That tiny difference matters! If the page suddenly started showing scary pop-ups saying things like “Your antivirus has expired,” “Virus detected,” “Your computer is infected,” or “Click here to clean your computer,” take a breath.
Your computer is probably not screaming for help. Your browser is.
In many cases, this happens because a website tricked the browser into allowing notifications. Once allowed, that site can keep sending fake security alerts that look much more official than they really are. It is annoying, deceptive, and designed to make people panic-click.
The good news: this is usually fixable.
What Happened?
This type of issue is often caused by a scam technique called domain squatting or typo-squatting.
Bad actors register website names that look almost identical to real websites. They count on people missing small spelling changes, especially when they are moving quickly, using a phone, clicking a link from a document, or assuming the site is familiar.
It is the digital version of putting a fake storefront next to the real one and hoping someone walks through the wrong door.
The fake site may then try to convince you to click Allow on a browser notification prompt. Once that happens, the site can send pop-ups through your browser that look like urgent antivirus warnings, expired subscription notices, or system infection alerts.
These messages are meant to look frightening. That is the point. Scared people click faster, and scammers know it.
What Is the Goal of the Scam?
The fake site usually tries to do one or more of the following:
Get permission to show browser notificationsThis is what causes the fake virus alerts to keep appearing.
Scare the user into clicking somethingFake warnings often use urgent language like “infected,” “expired,” or “clean now.”
Push the user toward a fake support page or fake software downloadThis may lead to actual malware, unwanted software, or a scam payment page.
Trick the user into entering sensitive informationThis could include passwords, payment information, or personal details.
In the case we reviewed today, the behavior looked primarily like browser notification abuse. That means the website may not have installed a traditional virus, but it did convince the browser to allow malicious pop-ups.
That said, if anyone downloaded software, entered a password, entered payment information, or called a number shown on the fake alert, that should be treated as more serious.
First Things First: What Not To Do
If you see fake security pop-ups:
Do not click “Protect,” “Clean,” “Renew,” “Scan,” or anything similar.
Do not call any phone number shown in the pop-up.
Do not enter payment information.
Do not enter your password.
Do not download anything from the warning page.
Close the browser if you can. If the pop-ups keep appearing, follow the cleanup steps below.
Cleanup Steps for Microsoft Edge
These steps remove the website’s ability to keep sending fake alerts.
Step 1: Remove Suspicious Notification Permissions
Open Microsoft Edge.
Click the three dots in the upper-right corner.
Click Settings.
Click Cookies and site permissions.
Click Notifications.
Look under the section that says Allow.
Remove or block any suspicious or unfamiliar websites.
Look especially for sites that look strange, misspelled, or unrelated to what you were trying to visit. Examples may include:
online.factsmgt.com
safesoftguard.com
gruvoza.pro
upeo-prosec.co.in
You may not see those exact names, but anything unfamiliar should be reviewed.
To remove one:
Click the three dots next to the site.
Choose Remove or Block.
My preference: choose Block if the browser gives you that option. It is the digital equivalent of saying, “No thanks, and please do not come back.”
Step 2: Reset Permissions for the Suspicious Site
In Edge, go to:
edge://settings/content/all
Search for suspicious sites, especially anything related to the mistyped FACTS link or fake antivirus pop-ups.
For each suspicious site:
Click the site.
Choose Delete data or Reset permissions.
Confirm the change.
Step 3: Check Camera and Microphone Permissions
The fake pop-ups are usually caused by notification permissions, not camera or microphone access. Still, it is worth checking.
In Edge, open these pages:
edge://settings/content/camera
edge://settings/content/microphone
If you see an unfamiliar website listed under Allowed, remove it.
If the suspicious site is only listed under notifications, that does not mean it had camera or microphone access.
Step 4: Check Browser Extensions
In Edge, go to:
edge://extensions
Remove anything unfamiliar, especially extensions related to:
Security scans
Coupons
Shopping
Search tools
PDF tools
“Cleaner” utilities
Browser protection
Some legitimate extensions have boring names. Some suspicious extensions have very helpful-sounding names. Be skeptical.
Step 5: Clear Browser Data
In Edge, go to:
edge://settings/clearBrowserData
Use these options:
Time range: All time
Select:
Browsing history
Cookies and other site data
Cached images and files
Site permissions
Then click Clear now.
Cleanup Steps for Google Chrome
Step 1: Remove Suspicious Notification Permissions
Open Chrome and go to:
chrome://settings/content/notifications
Look under Allowed to send notifications.
Remove or block suspicious sites, especially anything that looks misspelled, random, or related to fake antivirus alerts.
Examples may include:
online.factsmgt.com
safesoftguard.com
gruvoza.pro
upeo-prosec.co.in
To remove one:
Click the three dots next to the site.
Choose Remove or Block.
Step 2: Reset Site Permissions
In Chrome, go to:
chrome://settings/content/all
Search for suspicious websites.
For each one:
Click the site.
Choose Delete data.
Remove or reset permissions.
Step 3: Check Camera and Microphone Permissions
Open these pages in Chrome:
chrome://settings/content/camera
chrome://settings/content/microphone
Remove any unfamiliar websites listed as allowed.
Again, seeing notification permissions does not automatically mean the site had access to the camera or microphone.
Step 4: Check Chrome Extensions
Go to:
chrome://extensions
Remove anything unfamiliar or suspicious.
When in doubt, disable the extension first and ask for help before removing it.
Step 5: Clear Browser Data
Go to:
chrome://settings/clearBrowserData
Use these options:
Time range: All time
Select:
Browsing history
Cookies and other site data
Cached images and files
Site settings
Click Clear data.
Cleanup Steps for Mozilla Firefox
Firefox can also allow website notifications, so it is worth checking.
Step 1: Remove Suspicious Notification Permissions
Open Firefox.
Click the three lines in the upper-right corner.
Click Settings.
Click Privacy & Security.
Scroll to Permissions.
Next to Notifications, click Settings.
Look for suspicious or unfamiliar websites.
For each suspicious site:
Change the permission to Block, or remove it.
Click Save Changes.
Step 2: Check Camera and Microphone Permissions
In the same Privacy & Security section, look for:
Camera
Microphone
Click Settings next to each one and remove unfamiliar websites.
Step 3: Check Firefox Extensions
Click the three lines in the upper-right corner.
Click Add-ons and themes.
Click Extensions.
Remove anything unfamiliar or suspicious.
Step 4: Clear Recent Browser Data
Go to Settings.
Click Privacy & Security.
Scroll to Cookies and Site Data.
Click Clear Data.
Then scroll to History and choose Clear History.
Use:
Time range: Everything
Select:
Browsing & download history
Cookies
Cache
Site settings
Click Clear Now.
Cleanup Steps for Safari on Mac
Safari handles permissions a little differently, but the idea is the same.
Step 1: Remove Website Notification Permissions
Open Safari.
Click Safari in the top menu.
Click Settings or Preferences.
Click Websites.
Click Notifications on the left.
Look for unfamiliar or suspicious websites.
For each suspicious site:
Select the site.
Change it to Deny, or remove it.
Step 2: Check Camera and Microphone Permissions
In the same Websites section, check:
Camera
Microphone
Remove or deny unfamiliar websites.
Step 3: Clear Website Data
Open Safari.
Click Safari in the top menu.
Click Settings or Preferences.
Click Privacy.
Click Manage Website Data.
Search for suspicious sites.
Remove them.
You can also choose Remove All, but that may sign you out of websites.
Run a Security Scan
After cleaning the browser, run a scan.
On Windows
Open Windows Security.
Click Virus & threat protection.
Click Scan options.
Choose Full scan.
Click Scan now.
If you clicked anything beyond the browser pop-up, downloaded a file, or entered information, consider running Microsoft Defender Offline Scan as well.
On Mac
Mac users should still review browser permissions and extensions. If something was downloaded or installed, check:
Applications folder for unfamiliar apps.
System Settings > Login Items for unfamiliar startup items.
Browser extensions.
If your organization provides endpoint protection, run a full scan from that tool.
Did This Website Access My Camera or Microphone?
Probably not, unless you specifically allowed camera or microphone access.
The fake virus alerts are most commonly caused by notification permissions. These allow a website to send pop-ups through the browser. They do not automatically grant access to the camera or microphone.
To confirm, check your browser’s Camera and Microphone permission pages using the steps above.
If the suspicious website appears under Notifications, that explains the fake pop-ups.
If the suspicious website appears under Camera or Microphone, remove it and notify your IT support team.
When to Ask for Help Immediately
Contact IT or your support provider if any of the following happened:
You entered a password.
You entered payment information.
You downloaded or installed anything.
You called a phone number from the pop-up.
The pop-ups continue after following the cleanup steps.
The browser opens strange pages on its own.
Your computer becomes unusually slow.
You see new apps or extensions you do not recognize.
The browser notification issue is usually simple to clean up. Passwords and payment information are a different story and should be handled quickly.
How to Avoid This in the Future
A few practical habits help:
Check the website address before entering information.Small spelling differences matter.
Be suspicious of urgent security warnings in the browser.Real antivirus alerts usually come from your installed security software, not a random web page.
Do not allow notifications from unfamiliar websites.Most websites do not need notification access. A payment portal definitely does not need to shout at you later.
Do not trust pop-ups that ask you to clean your computer.If a website says your computer has five viruses, it is usually trying to sell you the sixth.
Use bookmarks for important portals.For school, banking, payroll, and payment sites, bookmarks reduce the chance of mistyping or clicking the wrong link.


Comments